Interior French Doors TIPS
- Gaps between doors and jambs must be equal
- Rough opening must not be twisted - SEE TEST BELOW
- Watch french door install video below
- Use hidden screws in top hinges to secure doors
- CLICK HERE to Get Tim's FREE & FUNNY Newsletter!
DEAR TIM: I’ve decided to install some interior french doors. At the present time I’m a rookie carpenter, hence I’m intrigued by some pre-hung interior french doors I saw at a lumber yard.
What’s your opinion of these doors? What else can you share that will help me install interior french doors like you might do it?
What secret tips will make the job go faster and easier? Michael G., Burbank, CA
DEAR MICHAEL: Installing interior french doors, assuming you’re a real rookie carpenter, is going to sap you of every bit of skill and patience you have at this point in your DIY career.
Interior French Doors are Challenging
It’s hard enough hanging a single pre-hung door, much less a set of french doors. I’ve installed many pre-hung interior french doors with great success.
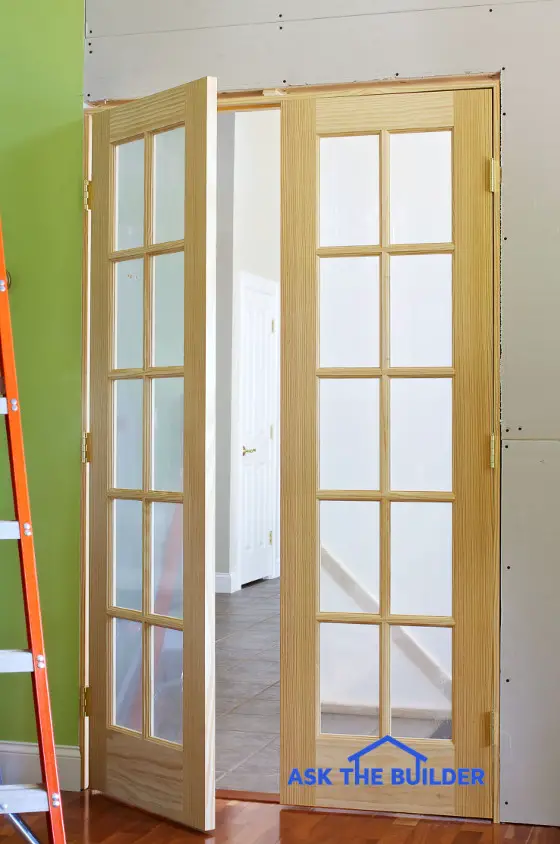
These interior french doors just need trim, paint and hardware to be complete. PHOTO CREDIT: Brent Walter
Double interior french doors are hard to install because you have additional tolerances you must satisfy to make the install look professional. The gap around all the doors and in between the two doors needs to be consistent and as equal as possible. This is much harder to achieve than you might think.
Related Door Links
How to Install a Pre-Hung Door
Free & Fast Bids
CLICK HERE to get FREE & FAST BIDS from local finish carpenters who can do this job for you.
Inspect The Doors First
The first step is to inspect the doors at the store. If you can see the hinge side of the doors, look to see if the reveal or gap between the doors and the jambs is pretty close all the way around the door.
You want a gap of just about one eighth inch everywhere. With this in mind, look at other doors if the jamb is bowed or the gap is wildly different. You certainly want everything in your favor before you take the door home.
Rough Opening Must Be Perfect
It's important to realize the first thing to get right as you begin to tackle your double interior french doors is the rough opening. This is the hole in the wall where the door fits.
I prefer to have my rough openings at least one-half inch wider than the overall unit size of the door. The unit size is the overall height and width of the frame that the doors hang from.
The same is true for the height. I like having the rough opening one-half inch higher than the the door frame’s overall height.
Interior French Door Installation Video
By all means this is a good video showing you many important steps in the install process.
Finished Floor Height Important
Remember, this height distance is measured from the top of the finished floor. It’s always better to have the door jambs sit on top of a finished floor instead of installing the door and then trying to butt up flooring to the door jamb.
Jambs Must Be In The Same Plane
Since the actual doors in your new french doors are undoubtedly perfectly square, this means that if the reveal or spacing in between the doors and the frame are equal, then the overall door frame is square. The two door jambs must be installed plumb, parallel and in the same plane.
IMPORTANT PRO TIP: Not only must the vertical rough studs must be plumb in both directions, but they also must not be bowed nor crooked.
CLICK HERE to get FREE & FAST BIDS from local finish carpenters who can do this job for you.
Avoid Twisted Rough Openings
Not only does the rough opening need to be square and plumb, but it’s also very important the opening is not a helix. This means that the opening has to be straight and plumb in both directions. If one leg of the rough opening is not plumb then the two doors, when closed, will not be even at the bottom. Are you still wanting to do this install? It’s now just getting interesting.
The Helix String Test
Use two pieces of string to check the rough opening. The rough opening is simply a square or rectangle when you stand back and look at it.
With this in mind, attach a string from one lower corner of the rough stud to the opposite upper corner. Do the same with the other two remaining corners.
The string will create the letter X across the rough opening. The rough opening is twisted if there's a gap between the two strings.
This is a crude drawing of a rough opening for interior french doors. The green lines are pieces of string attached to the corners of the rough opening. They must barely touch at the center of the "X". Copyright 2017 Tim Carter ALL RIGHTS RESERVED. Do NOT COPY
It's important to check the second string on both sides of the first string. A twisted or helical opening can look okay with the two strings touching in the center of the X, but the one string is actually putting pressure on the other string.
Level Floors Help You
You’ll also have an easy time if the floor under the door unit is level from one side of the opening to the other. If the floor is out of level, you’ll have to precisely cut down the door jamb on the high side of the floor the amount it’s out of level from jamb to jamb.
If you don’t do this, you’ll have to shim up the one jamb off the finished floor creating an ugly gap. Your margin of error here is less than one-sixteenth of an inch.
Tack the Door Frame In Place
Once you get the frame and the door jambs into the opening, tack it in place with 10-penny finish nails. Be sure to use thin shims to ensure the door jamb is plumb.
You’ll have to open and close the doors numerous times as you nail to constantly check the reveal and spacing between the doors and the door jambs.
Use Hidden Screws Under Top Hinges
After you’re satisfied that the door is installed and the spacing is perfect, I recommend installing a hidden screw behind the top hinge of each door. For this reason I prefer to use a 2.5-inch-long screw that’s driven through the door jamb into the rough opening framing lumber.
This screw ensures that the doors stay in position for years. After all there’s tremendous tension on the top hinge, and the screw will anchor the doors to the rough framing.
Set the Nails
You’ll also need a nail set tool to drive the finish nails below the surface of the door jamb. Be very careful as you hammer the nails so the head of the hammer never touches the surface of the wood. You don’t want any rookie beauty marks on the door jamb.

These are standard nail sets. The yellow one has the smallest tip. These are very affordable and work well. CLICK THE PHOTO to have these nail sets delivered to your doorstep in days.
Seal the Tops & Bottoms Of The Doors
The french doors must not warp. For this reason, paint the top and the bottom of your wood doors with a minimum of two coats of paint or clear urethane.
This paint significantly slows the absorption of water vapor into the long vertical stiles of the doors. If too much water gets into the door, it can warp it.
Generally speaking you'll struggle with your first attempt. Don't beat yourself up. Installing interior french doors like a pro can be done, however you'll have to work hard this first time to get superb results.
CLICK HERE to get FREE & FAST BIDS from local finish carpenters who can do this job for you.
Column 842
The post Interior French Doors appeared first on Ask the Builder.
Via builders feed http://www.rssmix.com/
No comments:
Post a Comment