Remember a few days ago when we teased you with a photo of these in Krista’s 3D wood tree tutorial (and the wood Christmas stars tutorial)? Tease no longer — it’s time to show you how to build these rustic herringbone wood Christmas trees!

These will look so cute on your porch from November to February (or longer!) or they’re a great size to use in an entryway, too. Watch the video to learn how, and grab the printed instructions below.
DIY Rustic Herringbone Wood Christmas Trees
Click here to get free printable building instructions
You can build these cute sturdy trees for your front porch in no time! Here’s what you need
Supplies
- 2-3 Weathered fence slats (3 1/2 inches wide)
- 2 Weathered 2x4s
- 16 gauge 1 1/4″ finish nails
- 18 gauge 2″ finish nails
- Paint
Tools
- Miter saw
- Air compressor
- 18 gauge finish nail gun
- 16 gauge finish nail gun
Building Instructions
Step 1 – Cut herringbone pieces
These measurements are for a 3 1/2″ fence slat.

There are two ways you can make these cuts. The first is to cut the slats to length first, and the cut the 45s. This way has more waste.

The second way is to measure for your first cut (7″) and cut the 45 degree angle. Then flip your board and measure for your next cut (8 1/2″) adjusting your saw blade back to zero. Then measure your next cut (10″) and cut the 45, flip and measure for the next cut at zero. Continue measuring, flipping the board, and cutting for all of your pieces. You should be able to get all the pieces from one 6′ slat, and have very minimal waste. This is the way I cut the boards in the video
If you would like to make two trees here are the cuts for the second tree. This one has an additional row of herringbone.

If using the cut and flip method, you will need to use the scrap from your first tree.
Step 2 – Cut stand pieces
Cut your first 2×4 as shown below

1 – 24″, 1 – 34″, and 2 – 6″
Then cut your second 2×4 as shown below

6 – 6″ cuts
Step 3 – Assemble Stand
Now we will assemble the stand for each tree.

Making sure the 6″ piece is flush along the back and side edges, use your 16 gauge nail gun to attach the 6″ piece to the 24″ upright.

Next, butt another 6″ piece against the other 6″ piece and the narrow side of the stand. Nail into place.

Repeat for the next 6″ piece, working around the upright 2×4.
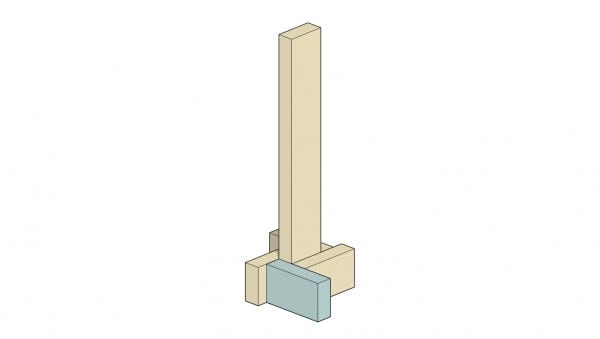
Place and nail the final piece.
Repeat this process for the 34″ stand if you are building two trees.
Step 4 – Tree assembly

Measure 3 1/2″ from the top of the horizontal pieces of the stand. Center the 9 3/16″ triangular piece and nail in place.
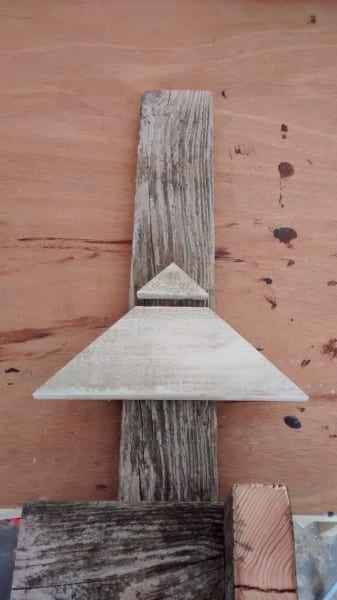
Place small triangle piece above the larger piece. Nail into place.
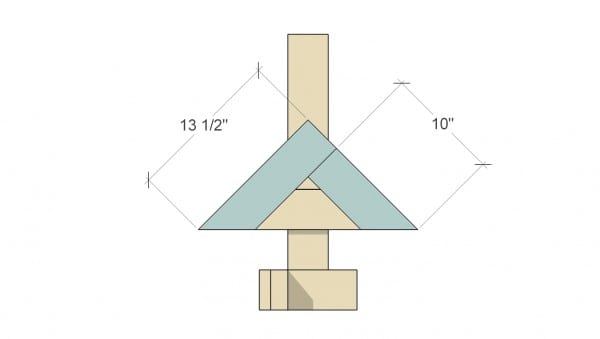
Place 13 1/2″ and the 10″ pieces, and nail into place.

Place the 12″ and the 8 1/2″ pieces, and nail into place

Place the 10 1/2″ and the 7″ pieces, and nail into place.

To assemble your second tree measure 6 13/16″ from the top of the horizontal pieces, and nail the triangular piece in place.

Continue with the small triangle, and then the 15″ and 11 1/2″ pieces. The rest of the tree will assemble in the same order as the first tree.

You can stop here, or paint the tree at this stage.
Step 5 – Paint


I used a dry brush technique to paint both of these trees so that you can see the character of the weathered wood beneath the paint. I used acrylic craft paint with a metallic sheen for the green tree, and a non-metallic white for the other.

I think you’ll love these trees, and use them year after year! Let me know if you enjoyed this build! and that rustic star tutorial will be coming soon!
Keep building with more Creative Christmas projects
and be sure to subscribe by email or RSS and follow along over on Facebook, Instagram , and YouTube with #CreativeChristmas so you won’t miss any of our new Christmas tutorials, recipes, and printables!
3D Wood Trees
Easy DIY Wood Christmas Stars, 5 Ways
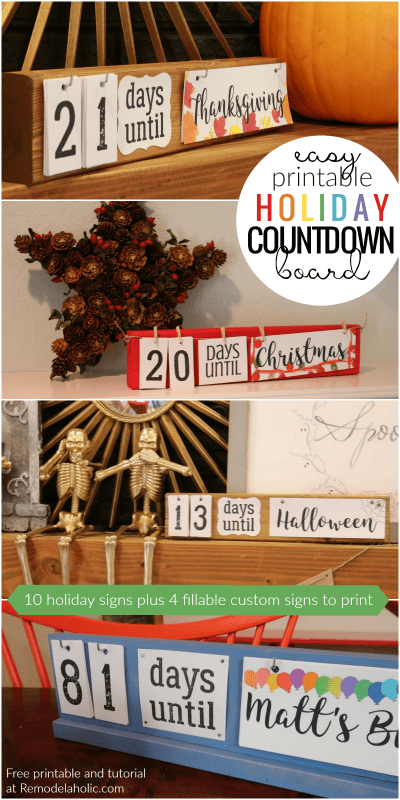
DIY Christmas and Holiday Countdown Board
The post How to Build Rustic Herringbone Wood Christmas Trees appeared first on Remodelaholic.


No comments:
Post a Comment